

This Quick Start Guide is designed to take you step-by-step through using CommonLook Dynamic to generate accessible and standards-conformant PDFs and, as such, CommonLook assumes that you (or your organization) have purchased CommonLook Dynamic. If you have yet to do so, please contact your account executive or send an email to sales@commonlook.com. If you’ve have obtained a license for CommonLook Dynamic, and you’re experiencing technical issues, please email support@commonlook.com.
In addition to this Quick Start Guide, follow this link to more CommonLook Dynamic online documentation.
Using CommonLook Dynamic
Important Note Before You Begin:
In this Quick Start Guide, you’ll be generating sample PDFs based on templates created by CommonLook and, for the content in the documents, you’ll be using data saved in Excel worksheets. Download the Excel data files from the links below prior to running CommonLook Dynamic. Be sure to save them in a location that you’ll easily remember and be able to find!
Download the workbook(s) below to generate a:
Let’s Get Started!
After downloading the Excel workbooks from the links above, to generate PDFs using CommonLook Dynamic, follow these steps:
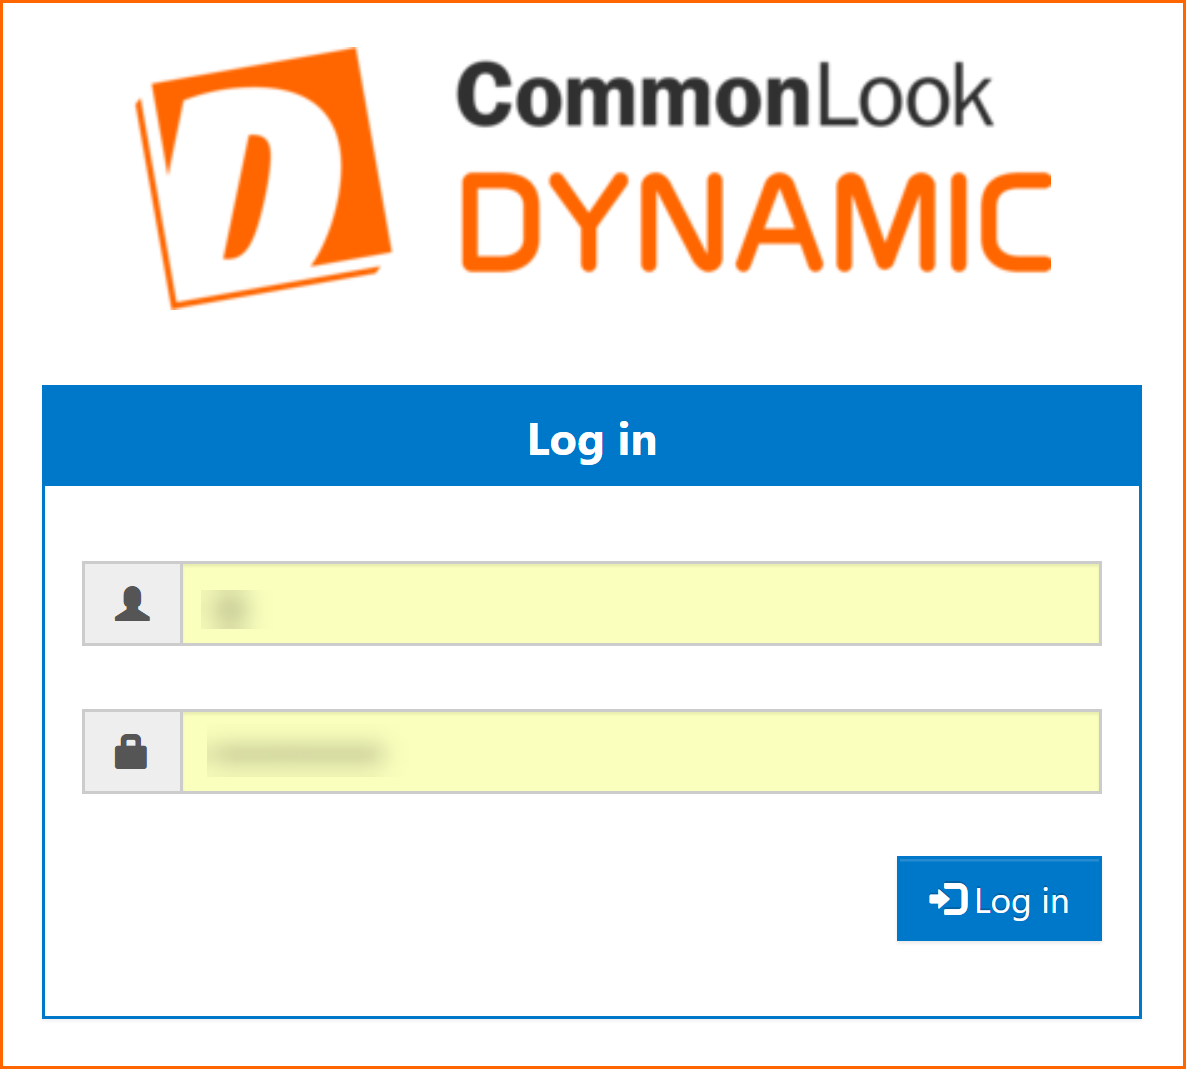
- Navigate to: The CommonLook Dynamic Login.
- Enter the User Name and Password as follows:
- User Name: Dynamic_Trial_User
- Password: TryingDynamic!
- Select “Login.”

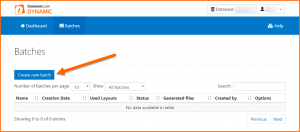
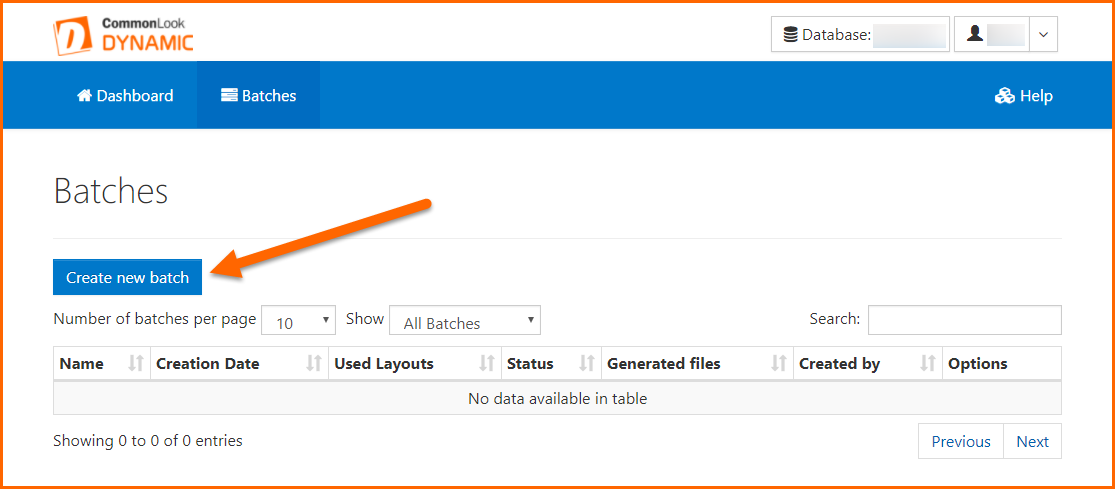
- Navigate to the Batches screen by selecting the “Batches” button in the toolbar.

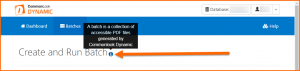
- Select the “Create new batch” button to open the “Create and Run Batch” screen.
Helpful Tip: On the “Create and Run Batch” screen, there will be information icons to provide additional help, if needed. Hover the mouse over, or tab to, the icons as needed.
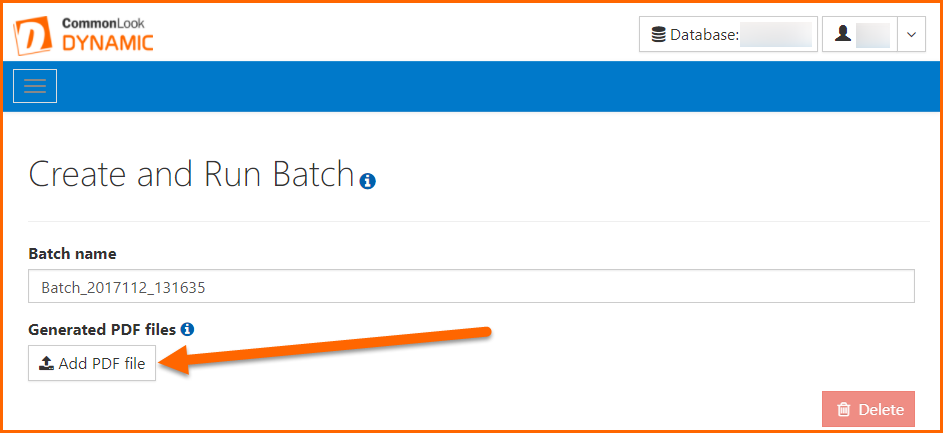
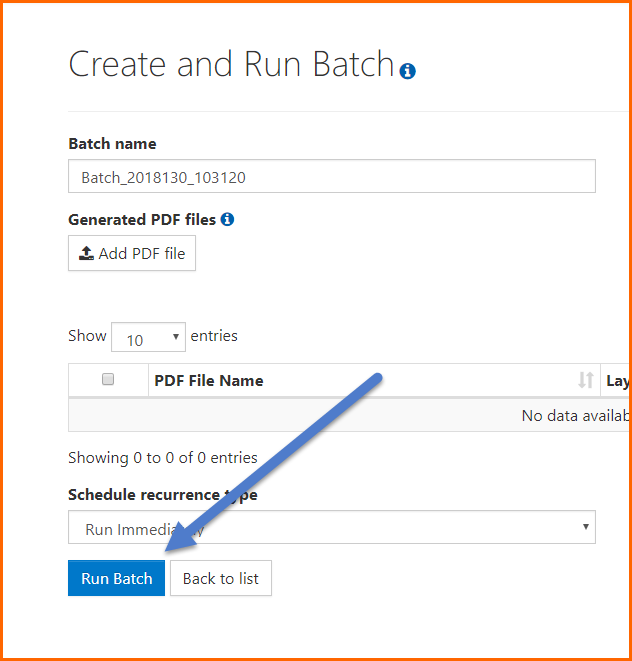
- On the “Create and Run Batch” screen, enter the information as explained below.
- Batch Name: Enter a name for the batch or use the name that CommonLook provides.
- Under “Generated PDF files,” select the “Add PDF file” button.
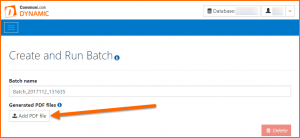
The “Add PDF file” dialog box will open so that you can specify the characteristics of a PDF file that is to be generated as part of the Batch.

Add or edit the following information as needed:

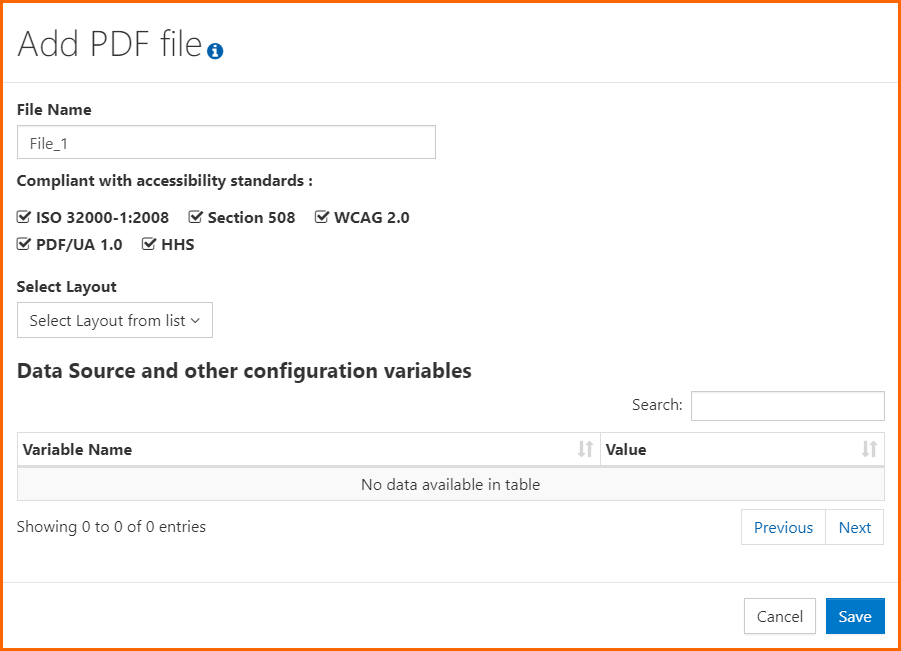
- File Name – CommonLook will automatically enter a file name. Edit it if you wish. (Remember conventional file naming rules regarding characters that are/ are not allowed in file names, length, etc.)
- Standards – By default, Dynamic will generate files that are conformant with all PDF standards including ISO 32000-1:2008, the “Original” Section 508, WCAG 2.0 AA (also known as the “Revised – 2017 Section 508”), PDF/UA 1.0 (ISO 14289), and HHS.
- Select Layout (Dropdown menu) – Choose a layout for your PDF. Options for this example include “Explanation of Benefits – Quick Start,” “Prior Authorization – Quick Start,” or “Directory – Quick Start.”
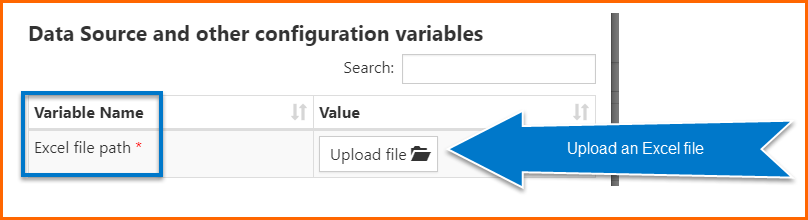
Note: In this phase, you’re adding one PDF to your batch so you can only select one layout. If you want to include other PDFs in Under “Generated PDF files,” select the “Add PDF file” button. - Data Source and other configuration variables:
Below this heading on the “Add PDF” screen, after choosing your layout, the “Variable Name” column in the table will indicate that an Excel file will be used as the data source. This is based on information built into the layout itself. In the “Value” column, select the “Upload file” button and then navigate to and choose the downloaded Excel Data Workbook that corresponds with the Layout that you selected in the previous step.
| If your Layout is: | Then the Data Source (Excel) should be: |
|---|---|
| Directory – Quick Start | Sample Directory |
| Prior Authorization – Quick Start | Sample Prior Authorization |
| Explanation of Benefits – Quick Start | Sample Explanation of Benefits |
- Save to return to the “Create and Run Batch” screen. From here, you can select the “Add PDF file” button again to add more PDFs to your batch.
- Scheduling – It’s possible to schedule CommonLook Dynamic to run in the future but, for this example, use the default “Run Immediately.”
- “Run Batch” – Choose this when you’re done adding PDF files and ready to create the documents.
Note: If you want to include additional PDFs in your batch then repeat the above steps starting with Step 6B (selecting the “Add PDF file” button).

Viewing/ Editing Batch Data
Please Note: When you are done with your batch(es), please Delete them from the Batches screen (as opposed to the Progress screen) so as to not fill up the server!
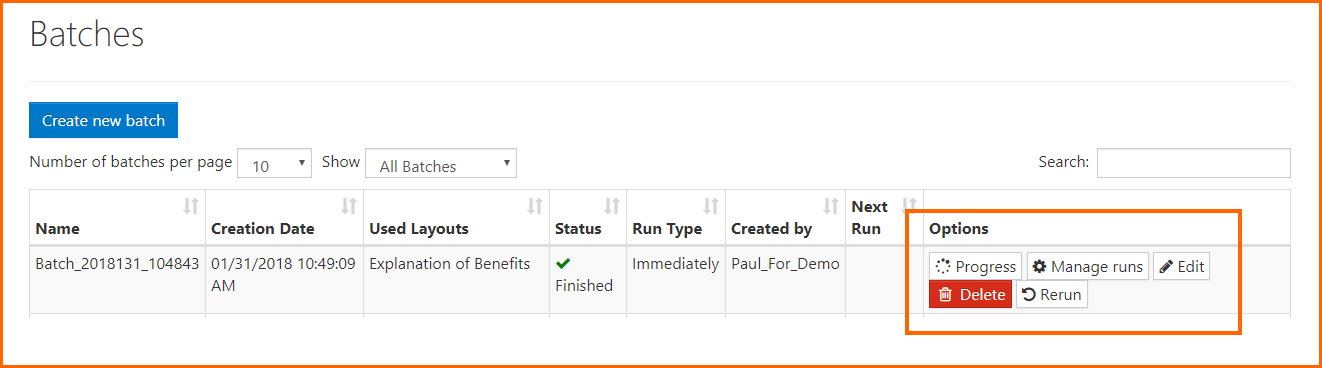
The batches that you’ve created will be displayed in the table on the “Batches” screen. The data provided includes the Name, Creation Date, Used Layouts, Status (Scheduled, Running, or Finished), the “Type” of run (based on scheduling options), who the batch was Created by, and “Next Run” information. (When batches are created and scheduled to run at a time other than “immediately” – “One time only,” daily, weekly, or monthly, the “Next Run” column will indicate the next time that the batch will be run and the PDFs will be generated.)
In addition, in the right column of the table, there are buttons for the following options: Progress, Manage Runs, Edit, Delete, and Rerun. These options are described in more detail below.
Progress (on the Batches screen)
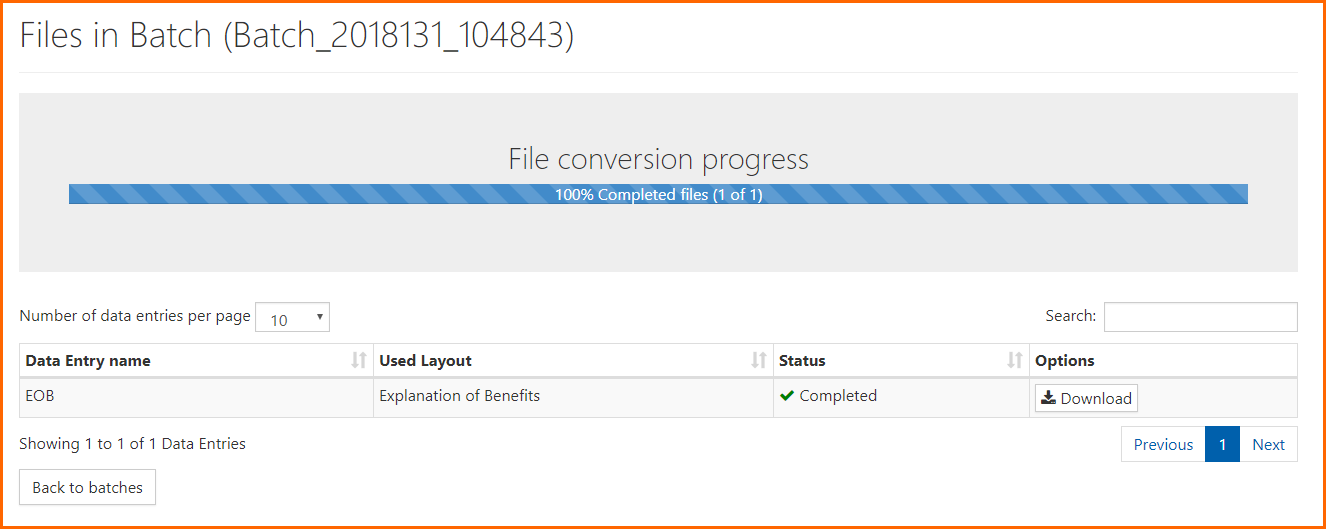
Select the “Progress” button to view the progress of the most recent batch run (this is important to know if the batch has been run multiple times, for example). The Progress screen will display a progress bar as well as a table with columns for the Data Entry name (the file name of the PDF), the Used Layout (the visual presentation of the PDF), the Status (Scheduled, Running, or Completed), and the option to Download.
Note: Each PDF in a batch will be listed in its own row in the table. Therefore, from here, it’s possible to download the PDFs individually (whereas using the “Download” button from the “Manage Runs” screen results in downloading all of the PDFs in the batch, at once, into a zipped folder).
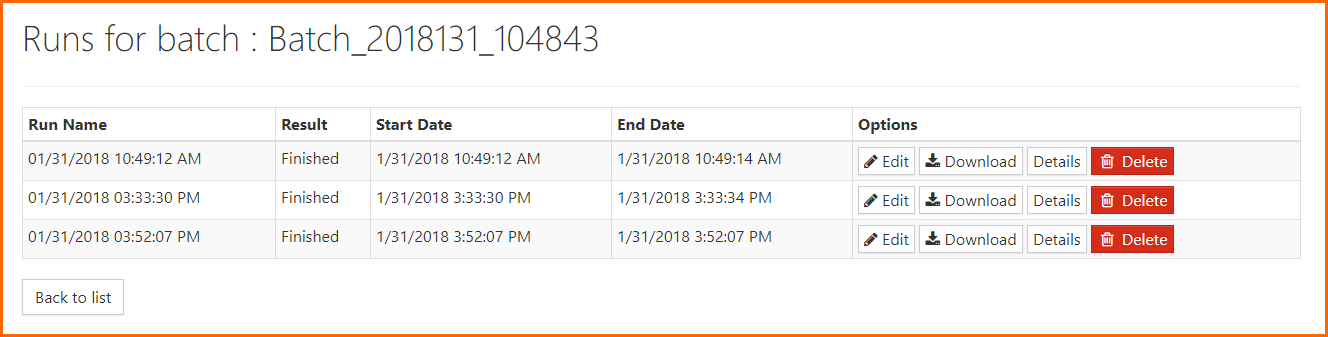
Manage Runs (from the Batches screen)
For individual batch data, select the “Manage Runs” button in the Batch Options. A table will display the Run Name, Result (Scheduled, Running, or Finished), Start and End dates and times, and, in the column on the right, there are additional options to Edit the run, Download the PDFs, view run Details, and Delete the run. These options are explained in more detail below. (Note: If a batch has been run multiple times, there will be a row in the table corresponding to each time the batch has been run.)
Options from the Manage Runs Screen:
Please note, the options listed below are available on the Manage Batch Runs Screen, after selecting the “Manage Runs” button on the Batches screen.
Edit: Change the name of the Run.
Download: Use the “Download” button to download the PDF(s) from a particular batch run in a zipped folder. Tip: When you select “Download” you may get a message asking you to wait while CommonLook Dynamic creates the compressed file. If you get that message, select “Ok,” wait a second, and then choose “Download” again to get your PDFs.
(Batches are put into zipped folders because it’s possible to generate multiple PDFs in a batch.)
Details: The “Details” button will take you to a screen providing the Progress information for the chosen run.
Displayed on this screen will be a progress bar as well as a table with columns for the Data Entry name (the file name of the PDF), the Used Layout (the visual presentation of the PDF), the Status (Scheduled, Running, or Completed), and the option to Download.
Each PDF in a batch will be listed in its own row in the table. Therefore, from here, it’s possible to download the PDFs individually (whereas using the “Download” button from the “Manage Runs” screen results in downloading all of the PDFs in the batch, at once, into a zipped folder).
Delete: Choose this button to delete a particular run from a batch.
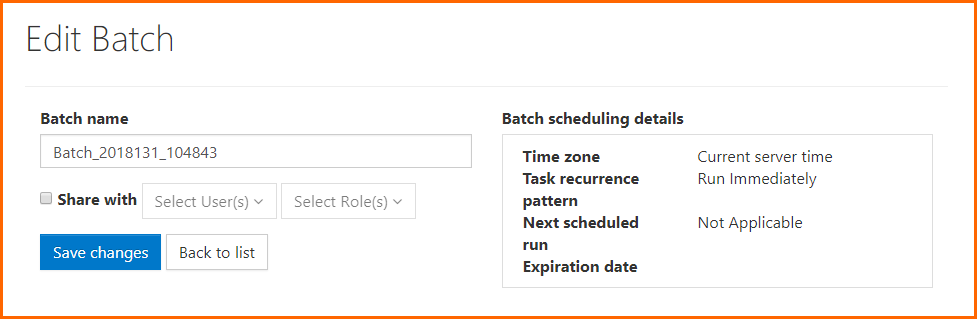
Edit (on the Batches screen)
Choose the “Edit” button to change the batch name, to share it with other users, and/or to view Batch scheduling details.
Note: You can only edit batches that you have created.
Delete (on the Batches screen)
Selecting the “Delete” button will delete the batch.
Note: You can only delete batches that you have created.
Reminder: When you are done with your batch(es), please Delete them from the Batches screen (as opposed to the Progress screen) so as to not fill up the server!
Rerun (on the Batches screen)
Choose this option to manually run the batch again (as opposed to scheduling it to be run multiple times).
Need Help?
If you need additional help with CommonLook Dynamic, please email us at support@commonlook.com or training@commonlook.com.