Named Destinations in PDFs
On this page: What I Why I How I Creating I Activating I Next Pages
What are Named Destinations?
A “Named Destination” can be a target for a bookmark or a link, referring to a page in a PDF. (Additionally, properties can be set for how that page is to be displayed for example with X, Y, and Z for the X and Y axes and then Z for zoom level.)
Why?
Named Destinations provide means for referring to explicit destinations indirectly. Just like an explicit destination can be a target for a link annotation or a bookmark, a Named Destination can be another “place” that a link can take you to in a PDF.
As a result, using Named Destinations makes it easier to implement and/or edit multiple links in a document going to the same place.
How?
Select the “Destinations” button in the ribbon of the Windows tab in CommonLook PDF to open the “Destinations” panel.

Listed in this panel are all of the Named Destinations in the document.
Users can sort by name or by page as well as add, edit, or delete them.
Note: If you choose to delete a Named Destination that has been assigned as the target to one or more link Annotations (or bookmarks), CommonLook will warn you that this destination has been assigned as the target to one or more links (and/or bookmarks) and that deleting it will cause the target of these links/bookmarks to be empty. (Of course, this will lead to other issues in the PDF such as the link Annotation (or bookmark) having an “invalid action.”)
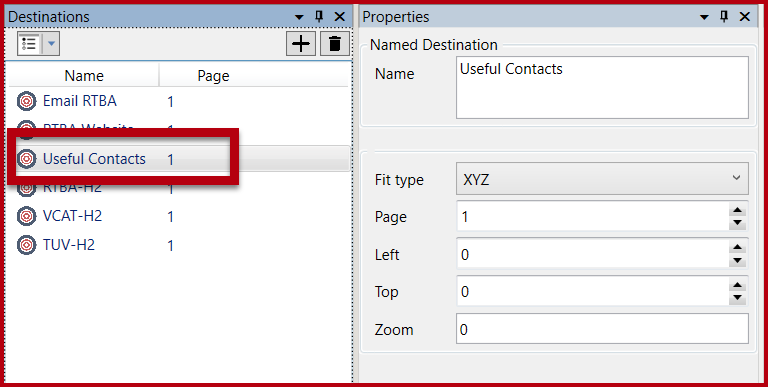
When a Named Destination is selected, its properties will be displayed in the Properties panel in CommonLook.
As Link Annotations Refer to Named Destinations:
When a Link Annotation is selected, in the Tags panel, for example, its properties, including the Target, will be displayed in the Properties panel in CommonLook.
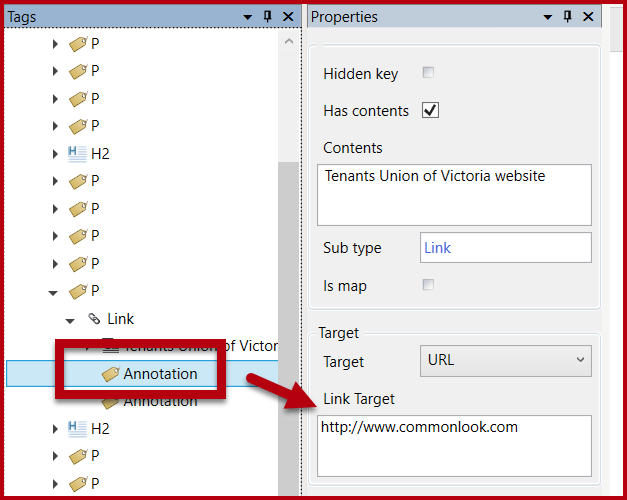
As shown in the screenshot below, Annotation Targets can be:
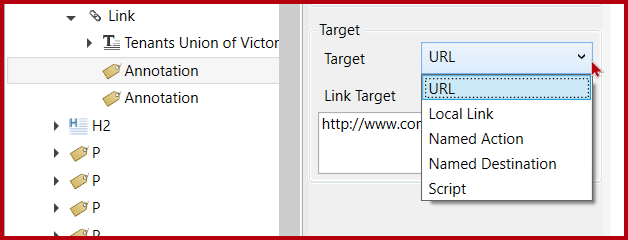
- URL – link to a webpage
- Local Link – link to another location in the document with Fit type and page # (X,Y, Zoom, too, for example)
- Named Action – the link then acts like a button to take you to the:
- Next Page,
- Previous Page,
- First Page,
- Last Page.
- Named Destination – the Named Destination refers to a specific (“explicit”) location.
Note: The Named Destination needs to be created before a link Annotation can have its Target assigned to it. Refer to the section below on “To Create Named Destinations” for more. - Script – JavaScript – When the link is selected, the JavaScript assigned to the annotation will be executed.
As Bookmarks Refer to Named Destinations:
Bookmark Targets can be either local links or Named Destinations.
To Create Named Destinations
- Navigate to the Destinations panel,
- Select the “New Destination” button,
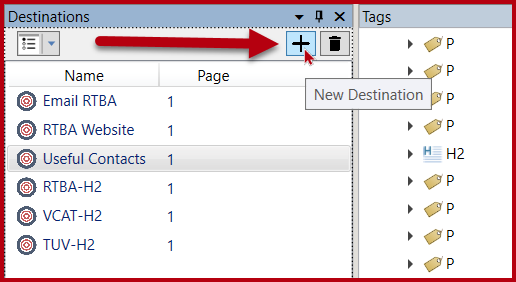
- Give the new Destination a name,
- Press the “Tab” or “Enter” key,
- Navigate to the Properties panel and provide the “Fit Type” and other properties information as needed. The “Fit Type” options are explained below.
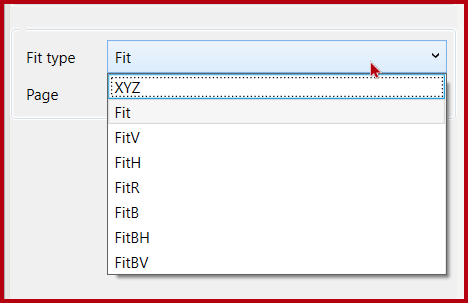
Named Destination Fit Types
- XYZ – The X and Y axes coordinates on the page as well as the Zoom level (Z)
- Fit – Fits to the page
- FitV – Fits vertically specifying the left edge
- FitH – Fits horizontally specifying the top edge of the destination
- FitR – Fits in a rectangle – specify Left, Right, Top, and Bottom
- FitB – Fit to a page zoomed in enough to fill the Bounding Box
- FitBH – Fit to page zoomed in enough fill the Bounding Box with the top edge positioned at the top coordinates of the Bounding Box
- FitBV – Fit to page zoomed in enough fill the Bounding Box with the left edge positioned at the left coordinates of the Bounding Box
To Activate Named Destinations
- Create (or edit as needed) the Named Destination,
- Go to a link Annotation or bookmark and change the target to Named Destination,
- Choose that Named Destination from the drop-down menu.
Next Pages
Follow the links below to view other pages in the User’s Guide:
Page 1- Welcome, Getting Started
Page 2 – The Toolbar and Ribbon
Page 3 – Insert Tag and Convert Tag Tabs