

Administration Options
Important Note: The Administration Tab is only available to Org. Admins. (or Super Admins. when hosting Clarity on their server). Some of the key functions in the Administration tab are described below.
On this page: Manage Users | Manage Licenses | System Configuration | Change Database

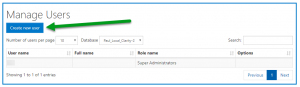
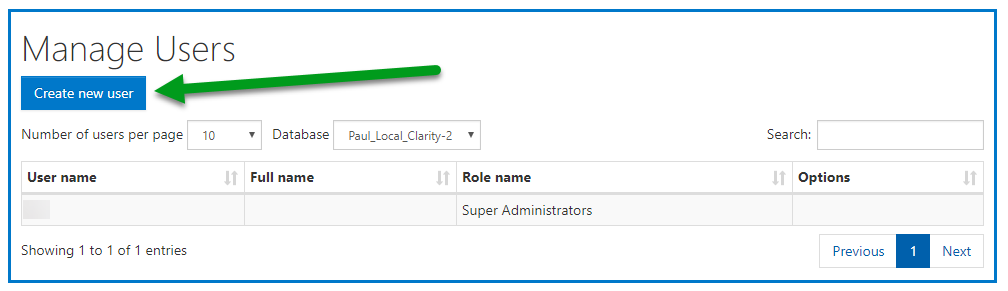
Manage Users
This screen will list User Names, Full Names, and Roles for everyone who has access to CommonLook Clarity. In addition, Super Admins. and Org. Admins. can create new users, edit or delete users, and/or change user’s roles.
To create a new user, follow these steps:
- On the Manage Users screen, select the “Create New User” button.
- Enter the required information as requested on the Registration Form.
The screenshot below shows the Registration Form with fields to enter a User Name, assign and confirm a password, enter the user’s first and last names and assign a role. Note: While Super Admins. can create other Super Admins., Org. Admins. can only create other Org. Admins. or App. Users.
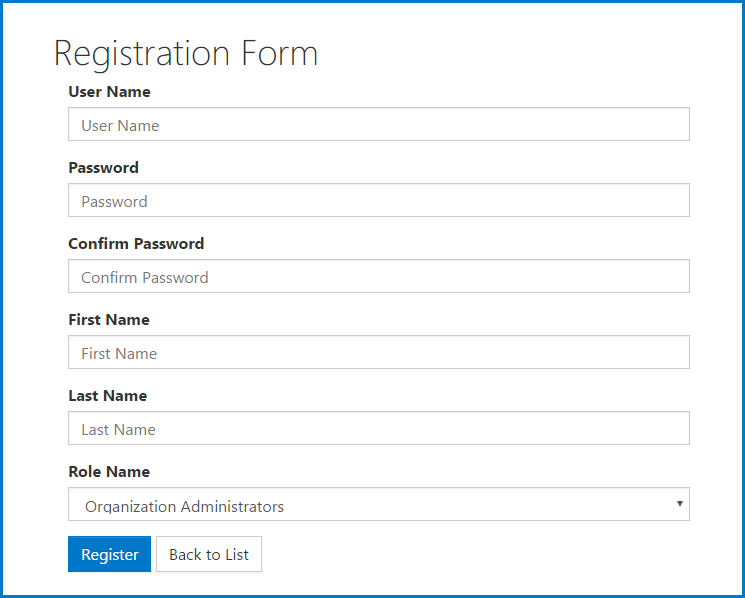
- Choose “Register” at the bottom of the Registration Form.
Manage Licenses
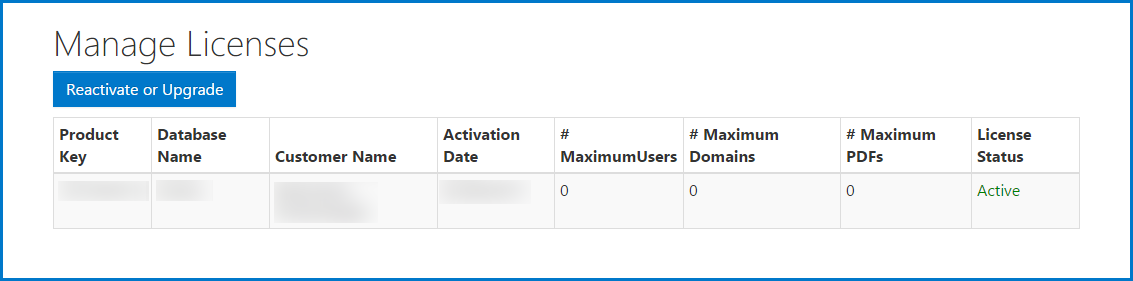
The Manage Licenses screen provides product information (for example, if you need technical support). Specifically, users can find their Product Key info, the Database Name, when the license was Activated, and the Maximum number of Users, Domains, and PDFs allowed. Also indicated will be the license Status – Active or Inactive.
System Configuration
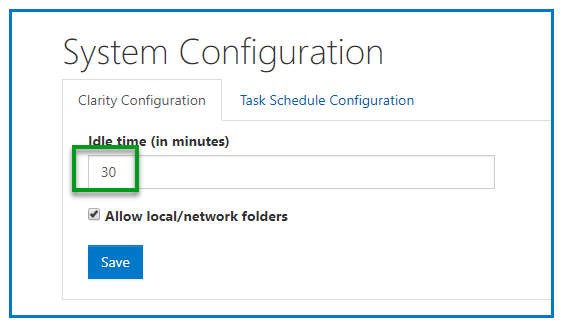
Clarity Configuration:
On this screen, change how long you have before Clarity times out when idle. Change the time limit, if needed, and then Save. Also, if you’re running Clarity on your own server, you’ll have the option to allow Clarity to scan local/ network folders.
Task Schedule Configuration:
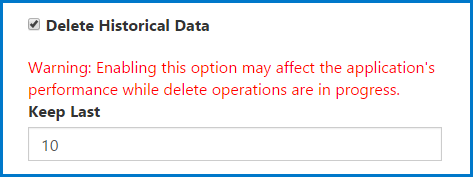
On this screen, there are a number of options but for the basic user, we recommend keeping the default settings. That said, if you would like to delete Historical Data (or change how much is saved by Clarity), check the checkbox near the bottom of this screen labeled “Delete Historical Data.”
When this checkbox is checked, then the “Keep Last” field becomes active and you can change the number of previous scans (Task Runs) that are kept. (Note: A warning will be displayed stating that “Enabling this option may affect the application’s performance while delete operations are in progress.”)
Change Database (Super Admins. Only – Hosting Clarity on Your Server)
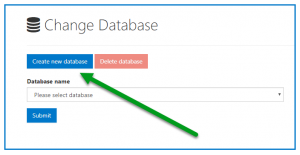
When Super Admins. sign into Clarity, they are immediately brought to the Change Database screen. If database(s) have already been created then choose the Database you want from the drop-down menu and then choose “Submit.” If you need to create a database, continue to the next section in this guide.
Create a Database
If you are hosting Clarity on your organization’s server then people in the organization can have the role of Super Administrator. (If CommonLook is hosting Clarity for you then we’ll be your Super Admin.) As a Super Admin., you may have to (or want to) create new databases from time to time (for example, the first time you login). If needed, follow these steps to create a new database:
- Sign into Clarity as a Super Admin.
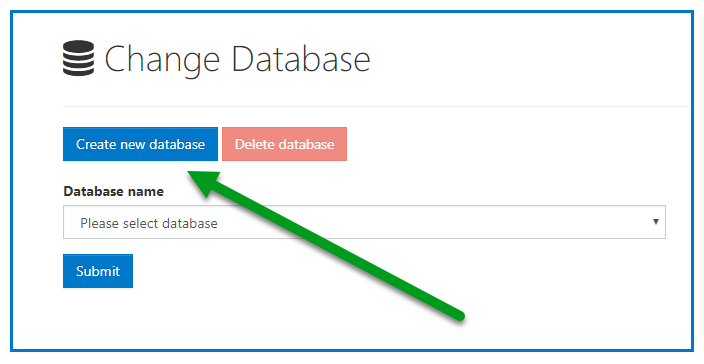
- In the Change Database screen, select the button to “Create new Database.”
- Fill in the required information as needed. The form fields are explained here:
- Database Name
- Server Name: The Machine Name and SQL Server instance name in the form of: MachineName\SQLServerName. (In most cases, this is the same as the value entered during setup for Instance name.)
- Authentication Options: Important: We recommend choosing the same option in this step that you used during the initial setup.
- Windows Authentication: If your organization doesn’t allow SQL Server Authentication then choose this option. (You needed to have chosen Windows Authentication during the initial setup, too.)
- SQL Server Authentication: Choose this option unless SQL Server Authentication is not allowed by your organization. If you choose this option, two more form fields will open:
- Server Login – The User Name of the SQL server (not your Clarity User Name).
- Server Password – Enter the SQL server Password (again, not your Clarity Password).
- Customer Name: – Your organization provided this to CommonLook when purchasing Clarity. (If you’re not sure, select the Administration tab in the toolbar and then, from the dropdown, choose License Key. The third column from the left is the Customer Name.)
- Product Key: This was provided in the delivery email at the time of installation and activation and is also available by going to the Administration tab in the toolbar and then, from the dropdown, choosing License Key. The first column on the left is the Product Key.)
- Activation Options:
- Activate by Internet. This is the preferred option.
- Activate by email. This option may be necessary due to firewalls and/or other security settings at your organization. If this is selected then additional fields will open as described next.
- System Information: This field will be autofilled. Copy the number in the box and send it to CommonLook Support (support@commonlook.com). They will then send you your Activation Key (the next field).
- Activation Key: After you send the System Information number to CommonLook, they will send you back the Activation Key. Input that number in this field.
- Allow Local/Network Folders: This allows Clarity to search for PDFs on the server machine, intranet, etc. (as opposed to PDFs online).
- Select “Create.”
Why Create Multiple Databases?
Because Org. Admins. and App. Users are limited to only seeing Domains, Tasks, Reports, etc., within their own Database, large organizations may want to create multiple databases, so as to limit who has access to which one. Consider this: Organization A has three “silos” within it. The Super Admin. can create three databases, one for Silo 1, a second for Silo 2, and another for Silo 3. By sharing Silo 1’s database with only the Org. Admins. and App. Users who work in Silo 1, the people who work in Silos 2 and 3 can’t access the database for Silo 1. Setting up the other silos in a similar fashion can result in:
- Ease of organization between silos.
- Increased privacy between silos.
- Decreased opportunity for one silo to accidentally edit or delete Domains, Tasks, Reports, etc., belonging to a different silo.